If you want to remotely access your desktop when you are away from home then read on...
While it is possible to just use your router to forward port 3389 to your desktop and then open an RDP session from anywhere, there are some distinct advantages to doing this over an SSH session.
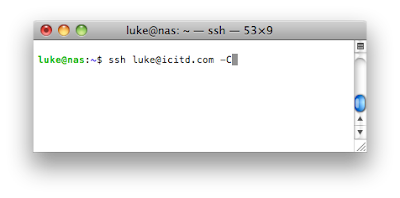
When connecting your SSH session you can specify the -C flag. This flag tells your client and server to compress the data that is sent over the network. This will reduce the amount of data flowing out from your home network (a plus if this is counted towards your monthly data allowance) by compressing the data.

Enter your user name and password and you will be looking at your home desktop!
While it is possible to just use your router to forward port 3389 to your desktop and then open an RDP session from anywhere, there are some distinct advantages to doing this over an SSH session.
Compression
The first reason is the ability to compress the data stream. This will add some CPU overhead to both your client and server to compress and then decompress the data. In my experience this extra CPU usage is tiny, even when using a Raspberry PI the CPU can easily handle it. The effect on the usability of the RDP session, on the other hand, is massive. This all depends on the upload speed from your network but an uncompressed session is generally pretty unusable, where a compressed session is comparable to a local session over a LAN.When connecting your SSH session you can specify the -C flag. This flag tells your client and server to compress the data that is sent over the network. This will reduce the amount of data flowing out from your home network (a plus if this is counted towards your monthly data allowance) by compressing the data.
Security
The RDP protocol was never designed to be Internet facing, if you google it you will find a number of ways to brute-force or dictionary attack the password to gain access. By using SSH you can implements key based authentication to ensure far better security.
So how do I do it?
I am assuming that you have a working SSH server and have remote access to this server. If you don't then have a look here. You can also install cygwin on your desktop to have an all-in-one solution.
When you establish your SSH session you need to tell it to do 2 things; compress the session and create a port forward for the RDP session.
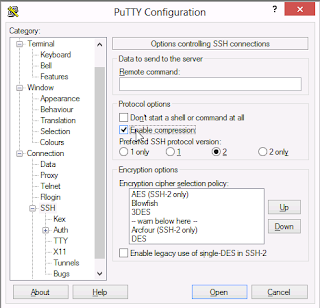
You specify compression with the -C flag on the command line and in PuTTY click on SSH on the left, then check "Enable Compression".


The next thing to do is set up the port forward. This works by creating a link between 2 ports one on your client to another on your server. This means any traffic that goes to the local port will travel to your SSH server over the SSH tunnel, then the server will forward it to the destination on your LAN.
Unix/Mac
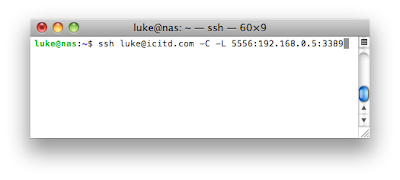
The command looks like this: -L 5566:192.168.0.5:3389. Here is what each part of the command means:
-L - Local port forward, we are forwarding a local port on our client to the server.
5556 - The local port to be forwarded is 5556 (in this example)
192.168.0.5 - The IP address of your desktop on your LAN (you could use a hostname if your SSH server can resolve it)
3389 - The remote port that the traffic will exit on

Windows/PuTTY
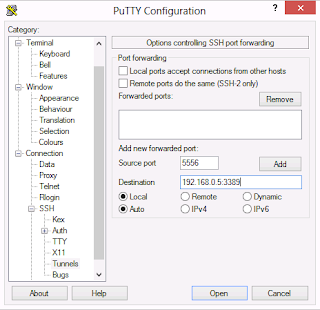
In PuTTY you specify the same details in a slightly different way. Expand "SSH" in the left panel, then click "Tunnels". Enter your local port 5566 into the "Source Port" box, then enter 192.168.0.5:3389 into the "Destination" box. Don't forget to click "Add"!


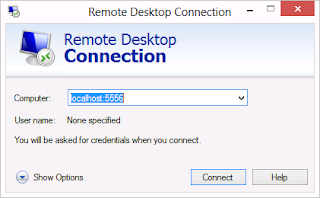
Connecting your RDP sesison
Now the easy bit, open up the Remote Desktop client and connect to localhost:5556. This will tell the client to connect to your local machine on port 5556, since we have forwarded that port to port 3389 on our home computer this will create a connection home.

No comments:
Post a Comment